
Best Multi-Window Multitasking Hacks for Windows 10
Windows 10 comes with a number of tools and in-built features that many users may be unaware of. These features can help them become much better and quicker at multitasking. If you frequently use multiple windows and application, then you should learn about the best multi-window multitasking hacks for Windows 10.
- Aero Shake for minimizing
The Aero Shake is a nifty little tool that allows the users to take hold of a window by its title bar and shake it for minimizing the rest of the open windows. The desktop may get much cluttered when too many apps are open. With Aero Shake, you can conveniently minimize all the other windows save for the selected one by merely shaking the title bar. To get all the windows back, just repeat the shaking action.
- Split Screens
Multi-taskers swear by split screen. You can split the Windows 10 screen into halves or even quarters. In the older Windows versions, users could only snap two windows at a time. However, now the users can snap four windows at a time. Simply drag the window to any one corner of the screen. Now, just keep pushing the window’s edge against the display’s edge. Repeat the action for other windows. Alternatively, just use the Win + Arrow keys.
- Use Multitasking Keyboard Shortcuts
Windows 10 comes with a number of wonderful keyboard shortcuts for easy management and navigation between open screens. To see the thumbnails of all the open windows, just use the Win + Tab keyboard shortcut. You can easily switch between open apps and other screens by just using the Alt + Tab keyboard shortcut. Moreover, you can set custom keyboard shortcuts to launch specific programs.
- Mini Player
Do you like watching movies, cat videos, or tutorials while working on your Windows 10 PC? Well, fortunately the Windows 10 Movies & TV application has a feature called Mini View which lets you watch the video a neat mini mode. This mode allows you to see the video in a smaller screen. This video window gets pinned to the top of the rest of the open windows. You can easily play or pause the video, fast forward or rewind it.
Jack Tucker is a security expert and he writes about Cyber security, cryptography, malware, social engineering, internet and is working at norton.com/setup
 2
2

How to Solve Ethernet Doesn’t Have Valid IP Configuration
Facing the Ethernet doesn’t have a valid IP configuration error standard? There is nothing new about it. The reason for the error is malfunctioning in Network Interface Card resulting in the prevention of the users to connect with the internet. Since the IP address is a significant body, it contains the local area of the user and where the internet was accessed.
But if the IP address is not generated, then the internet will not connect with the computer. In that situation how would you, as a user, surf the web? Undeniably a hard task for you to access the internet, but you don’t have to fret anymore. All you need to do is, follow the guide and solve the Ethernet doesn’t have valid IP configuration error.
Here’s how to Solve Ethernet Doesn’t have a Valid IP Configuration
Update Ethernet Cable
If any updates are missing and software is outdated, then the programs relating to the software are likely to disturb the experience while they are running. To prevent the software to show problems and issues, keep updating the software time to time.
- Open Control Panel and go to Device Manager.
- Click to expand the Network adapters.
- Now, the list of installed drivers in your system will display.
- Now right click on the Ethernet cable driver and select Update
- Click Search automatically for updated driver software.
- Your system will automatically search the updates and download it.
Disable the Network Adapter and use Command Prompt
- Open Control Panel.
- Now, go to Network and sharing
- Now click Change adapter settings from the left pane of the window.
- Right click on the connected network.
- Now, click Disable from the drop-down list.
- Press Windows key + S key combination and open Windows Search.
- Type cmd in the search and press Enter.
- Open Command Prompt and type the following commands
- IPconfig /release
- IPconfig /flushdns
- IPconfig /renew
- Restart your computer and check if the command has solved the problem.
Try Enabling DHCP
DHCP is a component which assigns the IP address to a computer. Hence the problem of Ethernet doesn’t have a valid IP configuration can be occurring due to deactivated DHCP. To resolve the issue try enabling the DHCP.
- Go to the network icon at the bottom right corner.
- Right click on it and select Troubleshoot
- Now a troubleshoot window will open.
- Select the network troubleshooter and click Run the troubleshooter.
- Now Follow the instructions.
- Check if the problem persists.
Try Retorting DHCP service
- Press Windows + R and type msc.
- Hit the Enter button from your keyboard.
- Now Services window will open.
- Navigate to DHCP Client and double click on it.
- In its Startup Value, select Automatic.
- Save the settings by clicking Apply and Ok.
- Now right click on DHCP Client and select Restart from the drop-down menu.
- Now, click Yes to confirm.
Try Changing Network Adapter Settings
- Press Windows key + R and type cpl in the run program.
- Now, right click on the connected network.
- Select the Properties from the drop-down menu.
- Check Internet Protocol Version 4 (TCP/IPv4) and click Properties.
- Click to Obtain an IP address automatically.
- Now click Obtain DNS server address automatically.
- Click Ok and restart or reconnect your router or cable.
Ethernet doesn’t have a valid IP configuration error will keep obstructing you from accessing the internet. But the methods are sufficient to eliminate the problem while trying to access the internet service.
Jack Tucker is a security expert and he writes about Cyber security, cryptography, malware, social engineering, internet and is working at norton.com/setup
1

How to Fix Wi-Fi Calling Isn’t Working on iOS and Apple Watch
Majority of people know about the Wi-Fi Calling feature on iPhone, Mac, iPad, and Apple Watch as well, which enables the users to receive phone calls over the internet even on the Wi-Fi signals. The feature is stunning and appreciated by those who use it. But, after the new updates, it seems that the feature is not working correctly.
The Wi-Fi Calling feature is not working on iOS devices and Apple Watch as well, unfortunately disabling the users to receive any call on Wi-Fi network. This could be frustrating, but there is no need to worry. If the Wi-Fi Calling feature is not working in your Apple device as well, then try the methods to troubleshoot the method. Let’s see the methods are making the approach to fix the Wi-Fi calling is not working problem.

Here’s how to fix Wi-Fi is not working on Apple Watch.
Ensure Wi-Fi calling is enabled
- Before doubting if there is a problem, you must ensure if Wi-Fi calling is active or not.
- Open Settings app in iPhone.
- Now go to Phone and tap Wi-Fi calling.
- Ensure that Wi-Fi calling on this iPhone is enabled. The green color indicates that it is activated.
Try Hard Reboot
Hard Reboot varies in different models and iOS versions.
- Hard Reboot for iPhone 6 Series– Long press the Volume Up Button + Home button. Keep the button pressed until the screen goes black and Apple logo appears.
- Hard Reboot for iPhone 7 Series– Long the Volume Down button + Power button until the screen goes black and Apple logo appears.
- Hard Reboot for iPhone 8 Series– Press and quickly release the Volume Up button and then quickly press and release the Volume Down button. Now long press Side button for 15-20 seconds until the Apple logo appears on the screen.
Reset iPhone Network Settings
- Open Settings app and tap on General.
- Now scroll down the screen and tap on Reset.
- Go to Reset Network Settings and tap on Reset Settings.
Try Switching the Networks
All Wi-Fi networks don’t support Wi-Fi calling. Hence it would be better to try switching the Wi-Fi network. It might help you to determine the Wi-Fi network supporting Wi-Fi calling.
Try Restarting the Router
Sometimes, the firmware of the Router is facing a problem. Hence, switching it off for a few minutes and turning on again might solve the problem of Wi-Fi calling.
Wi-Fi Calling Not Working on Apple Watch
- Ensure that Wi-Fi is enabled in Apple Watch.
- Open Apple Watch app on iPhone.
- Tap on the My Watch option.
- Go to Phone and turn on Wi-Fi calls.
- If it is already enabled, then switch it off to turn on again.
It is possible that the Wi-Fi signals are weak. In this situation, you will face the problem while using the Wi-Fi calling feature. Be patient and check out all the methods as well the wait to strengthen the signal or contact your Internet service provider.
Jack Tucker is a security expert and he writes about Cyber security, cryptography, malware, social engineering, internet and is working at norton.com/setup
1

How to Troubleshoot Kindle is Not Connecting With Computer
Kindle is an extremely famous e-reader device among various people across the world. For the book lovers, Kindle is like a portable digital bookshelf in the size of a tablet which they can keep in their pockets and take out to read any novel, poem, or any text, anytime they want. Kindle provides a convenient way to read a book without any hassle.
But sometimes, there is a problem when connecting Kindle devices to the computer. The Computer system does not recognize the e-reader device and consequently restricts the book lovers from transferring their stuff to the computer. A lot the users have tried to troubleshoot the problem but didn’t get success. Well, if you are also facing the same issue, then don’t hesitate to follow the methods mentioned below to resolve the problem.
Here’s how to troubleshoot Kindle is not connecting with the Computer
Install New Kindle Fire Application
Sometimes, the older Kindle Fire application doesn’t work and as a result causes the connectivity problems. Outdated software can bring the problems which will restrict the system to recognize Kindle. If this happens, then you won’t be able to transfer the music or e-books to the computer. Remove the older version from your computer and download the latest version of the Kindle app on your computer.
- Press Windows key + I button.
- No, select Apps in the Settings window.
- Click Apps & Features from the left pane of the window.
- Search Kindle in the right window.
- Click to Uninstall it and restart your computer.
- Once the system turns on, go to Amazon’s download page.
- You will find the link to download the latest version of Kindle.
- Click to download it and wait for the downloading process.
- Once the downloading is done, install the latest version. Now, the Kindle should connect with your computer.
The method is workable and efficient in solving the problem occurring with the connection between the Kindle device and computer.
Connect Kindle as Camera
Since the computer cannot recognize the device then try connecting it as camera will let you determine that the device is working fine or not. Once you plug in Kindle Fire, you will need to choose the device as a camera. Click the drop-down menu to select Camera.
Disable the USB Selective Suspend
It is reported that disabling USB selective suspend feature can immediately fix the issue of connectivity. The feature is enabled by default, but it can be disabled within a moment. The probability of connecting Kindle with your computer will be increased by disabling USB Selective Suspend.
- Open the Control Panel of your computer.
- Now, go to the Hardware and Sound category.
- Click the Power Options button, and a new window will open.
- Now, all the power plans will display on the screen. You have to select the one your system is using now.
- Click the Change plan settings option.
- Open the Advanced settings and click change advanced power settings.
- Navigate the USB settings and click to expand it.
- Click USB selective suspend settings to expand it.
- Select Disabled and select Apply.
- Now reboot your devices.
The methods mentioned above are enough to troubleshoot the problem. Kindle is an amazing product from Amazon, but sometimes when the problem occurs, these methods will help you fix the connection problem of the Kindle.
Jack Tucker is a security expert and he writes about Cyber security, cryptography, malware, social engineering, internet and is working at norton.com/setup
1

Tips to Enhance the Browsing in Firefox Quantum
Mozilla Firefox could be a future for the fast browsing experience because of its ability to browse the internet quickly. Although Chrome is well known as an internet software, but Firefox is gaining popularity with its capability of speed browsing. With time, there have been a lot of changes in Firefox from its icons to themes and functions, there were more features replaced the older ones.

Still, it was not the prioritized web browser in the computer system. But, the time is changing everything as Mozilla Corporation has looked forward with its Quantum version of Firefox with the speed browsing mechanism. You must be wondering for the tips to increase the speed of Firefox Quantum browsing, hence follow the guide to enhance your Firefox Quantum web browser.
Here are the tips to enhance the browsing speed in Firefox Quantum version
Activate the Private Browsing
Activating the private browsing will disallow the web browser to store the history. It means you don’t have to clean up the history and hence no cache memory will originate. Thus enabling the private browsing will be beneficial.
- Click to open the menu of the browser in your Firefox.
- Select the Preferences option.
- Now, select and click the Privacy tab.
- Go to History preferences and click Never remember history.
- Save the changes.
- The change in the browser will be noticeable.
Refresh Firefox Browser
Mozilla Corporation gave an option in its Firefox Quantum version to refresh the browser which can speed up Quantum.
- Go to the address bar in your web browser and type about:support.
- Now, press the Enter button.
- Now in the Give Firefox a tune-up section, click Refresh Firefox button.
- If you are prompted to do so, then click Refresh Firefox again.
Disable the Telemetry
The more data stored in the browser software, the slower it will perform. Firefox also generates cookies and collects data which should be cleaned up.
- Again go to the about:preferences.
- Find Privacy & Security option.
- Now, navigate to Firefox Data Collection and Use.
- Deselect the options in the current section.
- Now, relaunch Firefox.
Disable Accessibility
While the Firefox is slowing down, the slow performance can result in the memory crash and other unwanted results. The Accessibility Services can fix the issue with its disability.
- Open the browser and go to about:preferences.
- Now click Privacy & Security from the left panel.
- Check the Prevent Accessibility services from accessing your browser option.
Mozilla Firefox is definitely a browser which will replace other internet software products. It is capable of speed browsing which every internet user want today, to browse instantly and complete its work in a few moments. The tips mentioned above will help you enhance the browsing speed in Firefox Quantum.
Jack Tucker is a security expert and he writes about Cyber security, cryptography, malware, social engineering, internet and is working at norton.com/setup
1

Twitter to Tackle Dehumanizing Speech with User Help
Twitter stated that it will be transforming how it makes rules related to the Twitter use and it will incorporate feedback from others. As per a blog post published by Twitter, the company stated that it will urge everybody to give feedback regarding their new policy before it gets rolled out officially.
The post further stated that Twitter is bringing the transformation by urging people to give feedback regarding the new policy regarding dehumanizing language.

Their hateful conduct policy is extending to approach the issue of dehumanizing language and the harmful consequences it can produce in the actual world. In order to make the Twitter Rules easy to comprehend, they are working on something novel and urging people to take part in the process of development.
For the past few months, the company has been trying to make a policy to tackle content that makes people believe they are less than human. This includes normalizing severe abuse.
To a degree, dehumanizing language is incorporated in the present hateful conduct policy, that tackles hate speech including promoting violent behavior, direct attacks, and biased threats, and speech which discriminates against nationality, race, gender, orientation, disability, health disorders, etc.
Even with all the policies, people can still manage to be offensive and use harsh language to make other people feel inferior.
The upcoming policy is targeted at expanding the existing offensive conduct policy to include content that dehumanizes people depending on their association to a grouping, even if the language is not directly aimed at them.
Users cannot send the Feedback via e-mail. They need to fill out a survey.
The last day to fill the survey is 9th October. It is a short survey with just a couple of questions which the users can answer after going through the updated policy language.
For instance, the survey requires people to evaluate the transparency of the policy. They can give ratings from one to five. After that, people can offer suggestions regarding how the policy can be enhanced. They will also be asked to provide some examples of language that add to a wholesome discussion but may infringe on the system. This way, Twitter is trying to discover if there are any loopholes or exemptions.
Users can also offer more comments or feedback regarding the policy. They will have to enter their age, gender, and can provide their username if they want.
Twitter has not yet revealed to what extent the feedback will be used in the policy-making process. It has just stated that when it gets the feedback, it will carry on with the standard procedure and multiple teams will go through it.
The plan to include the society in policy-making is a significant move, and it could make individuals feel more engaged with the outline of the policies, and consequently – possibly! – more inclined to appreciate them.
However Twitter’s problems regarding harassment and hate language on its platform do not originate from bad rules– its rules mention stuff quite clearly, in several circumstances, concerning what can be permitted and what cannot. The issues arise because of slack in their implementation and execution. Twitter often fails to penalize or ban people who regularly violate the rules.
Jack Tucker is a security expert and he writes about Cyber security, cryptography, malware, social engineering, internet and is working at www.norton.com/setup
 4
4

Surface Book (Pro) Camera Not Working? Here’s How To Fix It
Many of the uses use their laptop camera for an online business meeting or live streaming or maybe just call their friends or family, and if that camera stops working, users may get much of trouble.
If the rear/front facing Camera of your Surface Pro 4 or Surface Book is not working and it is even not visible in Device Manager, then you can fix this problem. Many users are reporting this issue with their surface books. But the good news is it can be set easily just by following some of the simple steps given below.
Update the Camera App from Microsoft Store
An update to the Camera app is likely to restore and fix the issue. To do so:
Go to the Camera app by following the link, or you can just search for Windows Camera in the Microsoft Store. After that, you need to check if there is an update. If you find so, tap and update it right away, and see if the problem was solved for you.
Update Camera Drivers
All of the hardware needs a driver so they can work as they should. It is likely that you need to roll back to the previous/older driver where it was running for you, or you may update to the latest version. First I recommend trying to roll back, and then try updating if that doesn’t work.
- Launch the Device Manager by pressing WIN+X+M shortcut keys simultaneously.
- Tap on the arrow next to ‘Imaging devices.’
- Then you have to right-click on Microsoft Camera Front or Microsoft Camera Rear.
- Tap on the Properties option, and check if you have got an option to Rollback. If you found that option, then you need to roll back and see if the camera works for you or not.
- If you don’t find that option, you then need to tap on the Update Driver Software option. Doing so will launch the Windows Update to start seeing new drivers for your Windows Camera.
Note: You will also get an option to Search automatically for updated driver software. And this might require you to restart your Windows 10 computer. You then need to check camera software if works for you or not.
Run Hardware and Devices Troubleshooter
If the problem remains, you should then run the Hardware and devices troubleshooter. To do so:
- Open Settings.
- Go to Update and Security.
- Tap on Troubleshoot.
- Then go to Hardware and Devices.
- Now tap on Run the troubleshooter.
Disable/Enable Camera from UEFI
Unified Extensible Firmware Interface (UEFI) is an upgraded and developed version of BIOS (basic input/output system) which mainly works on the hardware level. It works to allow users to enable and disable the hardware.
- Boot into UEFI, and then you will be able to disable the camera.
- Boot into Windows 10 again. And restart your computer.
- And you have to boot into UEFI again, and then enable it.
Doing so will force Windows 10 for detecting for new hardware, and reinstall drivers as well.
Jack Tucker is a security expert and he writes about Cyber security, cryptography, malware, social engineering, internet and is working at norton.com/setup
Source : https://my-norton.net/surface-book-pro-camera-not-working-heres-how-to-fix-it/
 1
1
 Camera Not Working? Here’s How To Fix It)
Solutions for Common Apple TV Issues
Apple TV is a marvelous piece of hardware, and its several applications can revolutionize how you watch television. Users love their Apple TVs, but, at times things go wrong, and you may encounter some problems with your Apple TV. We did some research and compiled a list of some common Apple TV issues and how to fix them.

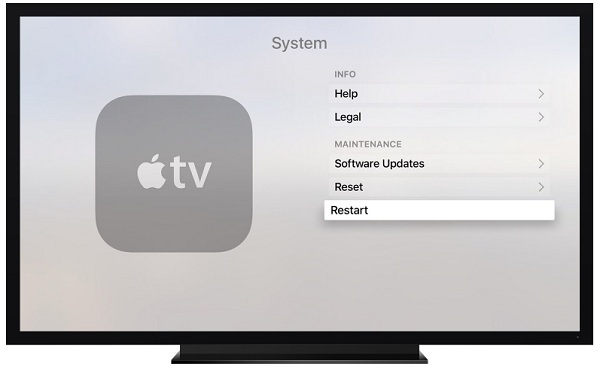
1- Boot with Reboot
A majority of times, restarting devices solves the issues. The same is the case with Apple TV. Here is how you can restart Apple TV:
- You can restart your Apple TV by pressing and holding the Menu as well as Home buttons on the Siri remote control simultaneously till the Apple TV box’s status light begins to twinkle.
- Go to Settings in Apple TV. Select System and click on the Restart now.
- Just detach the power source for 10-20 seconds and then re-attach it.
Wait for your Apple TV to restart. After that, check whether the software is up-to-date. Head over to Settings and select System. Go to Software Updates and click on Update Software.
2- Slow Wi-Fi Issue
You can confront several Wi-Fi related issues with your Apple TV. Apple TV might not be connecting to Wi-Fi, or it might keep dropping the Wi-Fi connection.
If your Wi-Fi is very slow, then you need to go to your Apple TV’s settings and select Network from the options. Now, see if any IP address is mentioned. When you can see an IP address, but the WiFi signal is poor, then you should shift the wireless access point nearer to your Apple TV. See if there is any wireless interference such as microwaves, wireless speakers, satellite dishes, etc. Check the settings of the Wi-Fi router and install its updates.
3- Loss of Audio
If you cannot hear any sound while playing a movie on your Apple TV, then you should do the following:
- Restart all the devices and check that the HDMI cable is connected at either side.
- You need to check the Apple TV volume control and see if the volume is not too low or at mute.
- Head to Apple TV settings and select Audio and Video. After that, go to Surround Sound and pick Best Quality Available.
4- Apple TV Storage Error
If you mirror a lot of content to your Apple TV, or if you have downloaded a number of apps, or have not removed caches, then you may run out of space. To clear out space, delete the applications you do not need any longer. For that, go to Settings and select General. Click on Manage Storage and locate the applications you do not need. Delete those applications.
5- AirPlay Issue
You can mirror content from your iOS or MacOS devices to the Apple TV using AirPlay. It streams content on TV via wi-fi or Bluetooth.
If you cannot mirror content via AirPlay, then you need to check whether the Apple TV and iOS or MacOS device are connected to the same Wireless network. Open Settings in Apple TV and see the Wi-Fi network. Also, make sure that AirPlay is enabled.
Jack Tucker is a security expert and he writes about Cyber security, cryptography, malware, social engineering, internet and is working at norton.com/setup
 1
1

Can’t Delete Inetpub Folder in Windows
Microsoft Windows has a default folder for its IIS, Internet Information Services. The folder keeps the website content and apps in an organized and secure manner. With the subfolders inside the Inetpub folder, the websites get hosted when the user is browsing. The Internet Information Services is responsible for providing the GUI (Graphical User Interface), the means of publishing, managing, creating and configuring the web. IIS not only provides GUI, but it also collects the web server information and stores in the Inetpub folder.
The Inetpub is located in the C: drive of a system containing five subfolders in it. These five subfolders –adminscripts, iisamples, mailroot, scripts, and wwwroot perform their respective task individually. The adminscripts subfoldercontains administrative scripts allowing the users to have automatic control on server administration task and administer the website served remotely from the Inetpub.
The mailroot subfolder is responsible for Simple Mail Transfer Protocol service. It is an email standard for emails circulation. The scripts subfolder contains web applications to add serviceability to the website. The iisamplessubfolder in Inetpub has sample applications which allow the developers to learn the system of website and web apps and how these works. In other words, the subfolder contains the content for demonstration purpose. The wwwrootsubfolder keeps all the web pages and content to publish them on the web. The wwwroot is a default directory for publishing web pages.
Though some users want to delete the folder, they don’t know how to delete it from the computer. This guide is about deleting the Inetpub folder so follow the steps mentioned below. But remember, you may find some issues in your computer after removing the folder. These could be- HTTP protocol is vulnerable, Microsoft index server buffer, etc.
- Press Windows Key and open the Start
- Type Control panel in the search box.
- Click to open Control Panel in your computer system.
- Now, click Program in the control panel window.
- In Programs tabs, find Turn Windows Feature on or off.
- Under it, click Programs and Features
- Windows Feature box will appear displaying a list.
- Find and select Internet Information Services.
- Now click Ok to save changes.
- Go to the C: drive where the Inetpub folder is located.
- Right click on the Inetpub folder and select Delete from the list.
- You can click on it and press Shift + Del button and then press Enter when a confirmation box appears.
The users complained that they are finding difficulty in deleting the Inetpub folder. Maybe they were not following the same procedure as above and skipping some steps. But the method mentioned above can delete the Inetpub folder.
Jack Tucker is a security expert and he writes about Cyber security, cryptography, malware, social engineering, internet and is working at norton.com/setup
1

How to Reset Google Chromecast
Google Chromecast is undoubtedly a whole new level of online video streaming in your television. Well, Google is known for its remarkable services and Chromecast being its product is admired very well. Even though, manufactured by a renowned company, Chromecast also can have problems and issues which you might need to troubleshoot. At times, Chromecast finds it hard to connect with an internet connection or sometimes doesn’t stream any content on the device, and the frustration begins when you don’t even know the reason for this unexpected behavior of the device.
Some users were able to deal with the problem as they performed a complete troubleshoot but most of the users still don’t know how to deal with the problem. Maybe you are also facing the same issue and looking for a solution for it. Don’t worry, resetting is a solution that you can efficiently perform and later reestablish the Chromecast connection with your devices. If you don’t know the steps to reset Google Chromecast, then follow the guide and troubleshoot the issue in a few minutes.
How to reset Google Chromecast
Before getting started, ensure that you have connected Chromecast with your TV or to Wi-Fi network.
- For those who have new Chromecast, open Homeapp on your phones.
- From the upper right corner, tap to open Settings.
- Tap to open a drop-down menu, again from the topright corner of the tab.
- Select FactoryReset.
- The will prompt you to confirm. Click Yes.
- If you have an older Chromecast, then the process can be different.
- Open Chromecaston your computer.
- In the Chromecast window, open Settings.
- Now select a Chromecast, if you have multiple of them, you want to reset.
- Now, click FactoryReset from the bottom of the window.
- Click Resetto confirm.
If in both, older and newer devices, the process to reset Chromecast fails, then there another way to reset the device. Sometimes, the problem rises to the extent that Chromecast doesn’t even connect with a device. In that situation how would you reset it? Well, there is a solution to that, and you will be able to perform the task quickly.
At the back of Chromecast USB port, you can find a small button. Connect the device with your TV and press that button for almost half a minute. You will notice a light blinked in the device indicating you to release the button. Wait for a few minutes, and the device will completely reset. Once the process is done, you can try initiating the process to setup Chromecast.
Jack Tucker is a security expert and he writes about Cyber security, cryptography, malware, social engineering, internet and is working at www.norton.com/setup
Source URL: https://nortonkeyactivation.com/how-to-reset-google-chromecast/
1

How to Prevent Your Apple Laptop from Overheating?
The problem of laptops overheating has been around for years. The cause behind this is rather simple. Laptop manufacturers have been trying a lot to make their product handier and smaller. Consequently, in order to accomplish their target, they must have started to make the parts, such as the hard drive, motherboard and more, handier and smaller and. However, they also have to set all these components and parts closer to each other. As we all know that the microprocessor, hard drive, and motherboard all of these tend to produce heat and the closer they are placed to each other, the more concentrated the heat becomes. Although, we have the fans that are built into our laptops to cool these components down, yet these fans also cannot work efficiently in such tight quarters. Add to this the fact that it’s easier said than done for the heat to escape, and you have overheating laptops. Whenever your computer overheats, it is more likely to fail in doing the tasks it is meant to. Here we have brought some tips for you that are going to help you prevent your apple laptop from overheating.
- Avoid putting your laptop on anything like a cushion especially when it is switched on. The soft material of a cushion could get in the way of the airflow vents, mainly the rear vents, which could be the cause for your laptop to overheat.
- It is highly recommended not to put anything over your keyboard when the laptop is operating in the closed-lid mode. Doing so is expected to cause your computer to turn off and on frequently. And this could generate great heat and could also drain the laptop’s battery.
- Remember to shut down your laptop overnight and do it daily to let it cool off. If you don’t use it regularly during the day, then you can set it to go into standby mode automatically when not in use. This is definitely going to save power and also, condense heat output from the components of your laptop.
- Ensure that your laptop is always switched off when it’s in your backpack. You should avoid carrying the laptop in a bag when it’s on because doing so can block the vents on the computer and cause it to overheat. Also, it reduces the life of the components of your laptop or worse; can cause a fire. Thus, the heat may also distress the battery life and can cause an explosion too.
- Always try to keep the air vents clean. Dust accumulates on the vents of your laptop that can obstruct them. This dust will stop your laptop from working efficiently. A small electric cleaner can help you clean dust off the vents. Your laptops can suck up lots of dust. However, it’s because everything in the computer is packed together so tightly, it makes these specks of dust is even more dangerous for your laptop. When the cooling fans are designed to run all the time, it’s just a matter of time before the system starts overheating.
Thank you for reading my article: I hope this information will be helpful to you.
Jack Tucker is a security expert and he writes about Cyber security, cryptography, malware, social engineering, internet and is working at norton.com/setup
Source URL : https://nortonkeyactivation.com/how-to-prevent-your-apple-laptop-from-overheating/
1

How to Remove and Avoid Red-Eye Effect in iPhone Photos?
How frequently does it happen – you have a brand new iPhone, have clicked some stunning photos at your colleague’s wedding, and are eagerly waiting to show them to your co-workers- only to find that everybody, including the bride and the groom, looks a part of the Twilight cast with their red eyes? Do not fret – red eye in pictures is an extremely common issue that everybody who uses a phone or camera with a flash to take pictures faces. This common issue can be fixed easily. Here is how you can remove red-eye in photos in an iPhone.

Remove Red-Eye Effect Using the Photos App
- Unlock your iPhone.
- Slide through the apps and locate Photos.
- Tap on the Photos app to launch it. Its icon is rainbow hue with a white background.
- Now, at the bottom of the app, on the right side, tap on the Albums icon.
- If the iCloud Photos Library is enabled, then tap on All Photos from the list of options in the Albums menu.
- If the iCloud Photos Library is not enabled, then tap on Camera Roll option in the Albums screen.
- Scroll up to locate the picture.
- Just tap on the picture you want to edit.
- When the image opens, tap on the Edit button located at the bottom right corner of the iPhone’s screen.
- Now, select the Red Eye Correction option located at the top left side of the screen. The icon is shaped like an eye.
- If the image was snapped without using flash, then the red eye will not appear.
- Now, just select the area where you want correct the red-eye. Tap on all the red eyes.
- If you are not satisfied with the results, then simply tap on the eye once more, and the changes will get removed.
- Tap on the Red Eye correction option at the upper left corner of the screen.
- Now, the main Photo Edit screen will open.
- Tap on the yellow Done button located on the bottom left side of the screen. Doing so will save all the changes made.
- If in future, you want to restore the original picture, then directly go to Edit. Tap on the Revert option located in the bottom left side.
How to Avoid Red-Eye Affect in Photos?
- Red-eye effect occurs when the flash of the camera in low or dim lightning reflects from them, and the pupils look red in the resulting image. If you are taking a picture in dark or low lightning, then turn off the flash.
Here is how you can turn off the flash in the camera:
- Open the Camera application.
- Tap on the Flash option located at the extreme top left side of the screen. It is represented by a bolt sign.
- If you select Auto Flash, then the flash will automatically be enabled when the lightning is either low or non-existent.
- Select the Off option if you do not want to use flash while taking pictures and videos.
- To avoid red eye, you can ask the image’s subject to shift their gaze. Instead of looking directly at the lens, they can look sideward.
Jack Tucker is a security expert and he writes about Cyber security, cryptography, malware, social engineering, internet and is working at norton.com/setup
Source URL : https://nortonkeyactivation.com/how-to-remove-and-avoid-red-eye-effect-in-iphone-photos/
1

How to Detect Which Apps Are Draining Your iPhone Battery
Our lives are slowly but steadily getting more and more dependent on electronics. A smartphone has become one of the most important and integral part of our life. We are way past the days when we would have to memorize contact numbers, ask around for directions, carry a camera to click photographs and get a review of a restaurant through word of mouth. With a smartphone, all of these are available at our fingertips. However, more than these devices, our lives revolve around the batteries that power these devices.
iPhone and battery issues seem to be going hand in hand. As the charge slowly leaves your iPhone, you keep hoping that there was some way through which you could prolong its life. The simplest way to increase your battery life and in turn your phone’s performance is through identifying the apps that are draining your battery and turning it off. This will save up your battery’s juice thereby powering up your device for a longer duration.
Steps to identify apps that are always running
Apps that are constantly running on your phone take up the most battery. Even if you have exited the app, chances are that they will be running in the background and constantly syncing or checking information to notify you of any message or downloaded data. Furthermore, some apps keep your screen on while other apps, like the ones that run games or play videos, can put a strain on your phone’s internal processor.
You may not have to stop using these apps, but it is important to identify the apps that are always running. Follow the steps given below:
- Launch the settings of your iPhone.
- Scroll below until you find the option for “General” settings
- Tap on Background App Refresh.
- Your phone will now display a list of all the apps that can refresh their content when you are connected over a cellular or WiFi network. If you do not use the particular app as often, you may turn off the app as it will preserve your battery.
- Tap on the toggle switch to turn the app refresh on. The switch will go from green to white.
Steps to identify the battery draining apps
You can easily identify the apps that are draining your battery. Here is how you can check the list of apps:
- Launch the settings of your iPhone
- Tap on Battery
- You can see the battery usage of your phone and the percentage of battery that has been used up each app for the past 24 hours.
- You can also preview the amount or percentage of battery used for the entire previous week too.
- When you tap on the app’s name, you can see the breakdown of how much of the battery was drained due to the active use of the app and how much of it occurred due to the app running in the background.
- If an app is taking up too much battery while being used in the background, you can turn it off especially if you do not need constant updates from the app. Do so by following the steps given above.
Jack Tucker is a security expert and he writes about Cyber security, cryptography, malware, social engineering, internet and is working at norton.com/setup
Source URL : https://nortonkeyactivation.com/how-to-detect-which-apps-are-draining-your-iphone-battery/
1

Five Tools to Make the Most Out of Netflix
Nowadays, all the content streaming services like, Hulu, Amazon, Netflix is the most popular streaming services which allow the users to easily watch their much-loved shows apart from the time, at any places.
In this article, we try to provide you the information about some best tools only to enhance your Netflix experience on Windows PC. These five tools will help you to make the most out of your favorite shows of Netflix by providing some additional playback features like custom subtitles, advanced bitrates settings and also help you in finding the best shows on Netflix.
Tools to Make the Most Out of Netflix
Netflix provides you instant access to the huge content on any of the devices. With the use of Netflix’s newest awe-inspiring feature, users can easily watch their favorite shows on any internet connected devices like Smartphone, tablet, gaming console and also smart TVs. This streaming service allows the users to enjoy a binge-watching direct from its enormous universal content library without even having to watch any of the commercial content in the middle. One of the most amazing features of the streaming app is the flexibility it provides for resuming and pausing your watching for the later period.
Moreover, Netflix has a wide content which varies according to the geography. Best is always not perfect so here is one drawback of this streaming app is that user will be displayed with the show which depends on where they reside. Additionally, sometimes it gets awkward to find the TV shows or Movies of your choice out of huge options.
Though there s always scope for improvements, so we try to provide you a list of tools which can help you to enhance the streaming experience in Netflix.
1- Super Netflix
The Super Netflix is one of the best tools for every user if you are looking for all in one Netflix tool. This is a very impressive tool for every user. This Chrome Extension allows you to easily change the quality of your video with just a single toggle, and also allows you to watch your favorite show without any spoilers and it will also help you in auto skip intros. It will also let users to upload custom subtitle files.
2- Flicksurfer
If you are shabby by scrolling down the huge library of Netflix only in search of some amazing shows, then you don’t need to worry about it. The FlickSurfer tool has made it tremendously easy to find the highest-rated content on the Netflix at any specified interval of time. Some users can bite down by content like movies, TV shows, and also genre. Moreover, the FlickSurfer.com also provides you the litheness for sorting the contents thus by the Netflix user rating, IMDB rating, Rotten Tomatoes rating, or an average of IMDB, Rotten Tomatoes and also the most important user ratings.
3- NetFlix Roulette
Some widespread contents which are available on Netflix might sometime confuse the user to decide that what actually they want to watch out next. The Flix Roulette/e will help you in making your task very easy by arbitrarily picking the show and also cease you from the problem of finding content out from the vast list.
4- SubFlicks
Sometimes, the user wants a subtitle for their show, now it’ is very easy with the Subflicks.com. The tool will allow you to download any subtitles files easily and also upload the same on Netflix. However, to enable this, you need to do is to download the “.srt” format subtitle form and also convert it to.“DFXP file.” Once it is completely done, then this file can be easily used on the NetFlix via the Smartflix as the channel.
5- /r/NetflixBestOf
There are too many options on Netflix so that users are confused about what to watch next on the Netflix? But don’t worry; you can easily get suggestions from the Reddit sub-thread called as /r/NetflixBestOf. This sub-forum makes things easy for the entire user to check their next title to watch, out of all the extensive content in the library.
Source URL : https://nortonkeyactivation.com/five-tools-to-make-the-most-out-of-netflix/
1

How To Disable Norton Protection Center On Mac And Windows?
Norton Protection Center is manufactured and sold by Symantec. It is a robust suite which protects devices against malware and other cyber threats. However, sometimes, this program might conflict with other programs. Users may not be able to install a new program because of the Norton Protection Center. You can disable Norton Protection Center by using different ways. Here is how you can disable Norton Protection Center on your device:
Disable Norton AntiVirus 2009 in Windows
- Go to Start and click on All Programs.
- Launch the Norton Security app.
- Go to Settings.
- Click on Computer Scans.
- Turn the Automatic Scan settings off.
- Norton AntiVirus 2009 will get disabled now.
- Click on OK and the settings will get saved.
Disable Norton AntiVirus 2007 in Windows
- Locate the Norton AntiVirus icon in the taskbar.
- Right-click on it.
- From the list, select Norton Protection Center.
- In the ensuing list, click on Norton AntiVirus.
- Go to Settings.
- Click on Virus and Spyware Protection Options.
- After that, go to Miscellaneous.
- Uncheck the box present next to Turn On Scanning.
- Finally, disable the Norton Protection Center.
Disable Norton AntiVirus 2006 in Windows
- Go to the taskbar and right-click on the Norton icon.
- Click on Norton Antivirus Options.
- Now, from the list of options, select Miscellaneous.
- After that, uncheck the box located beside Turn Norton Plug-In.
- The Norton program will get disabled.
Disable Norton AntiVirus Versions 2002 to 2004 in Windows
- Firstly, you need to launch the Norton antivirus program.
- Access the Norton settings.
- Go to Options.
- Click on Miscellaneous.
- Go to the box located next to Enable Norton Plug-in. If it is checked then uncheck it.
- Now, select the OK option.
- Reboot the system.
Uninstall norton.com/setup on Mac
Here is how you can remove Norton AntiVirus on your Mac by using Symantec Uninstaller:
- Go to the Applications folder by going to the dock.
- Now, go to the Norton software folder and open it.
- Double-click on the Norton Uninstaller file.
- Check the box located on the right-hand side of Norton antivirus which you have to remove.
- Click on the Uninstall button.
- Click on Yes in the confirmation prompt.
- Enter the admin account password for your Mac for the purpose of authentication.
- Click on Ok in the Authentication prompt.
- The next prompt will show a list of all the removed stuff.
- Close that window.
- Restart your Mac device.
- Source: https://bit.ly/2OOBdxk
